Friends keep asking me how my AI setup actually works. "You have one for each website? How do they know what the others are doing?" So this is the post I send them.
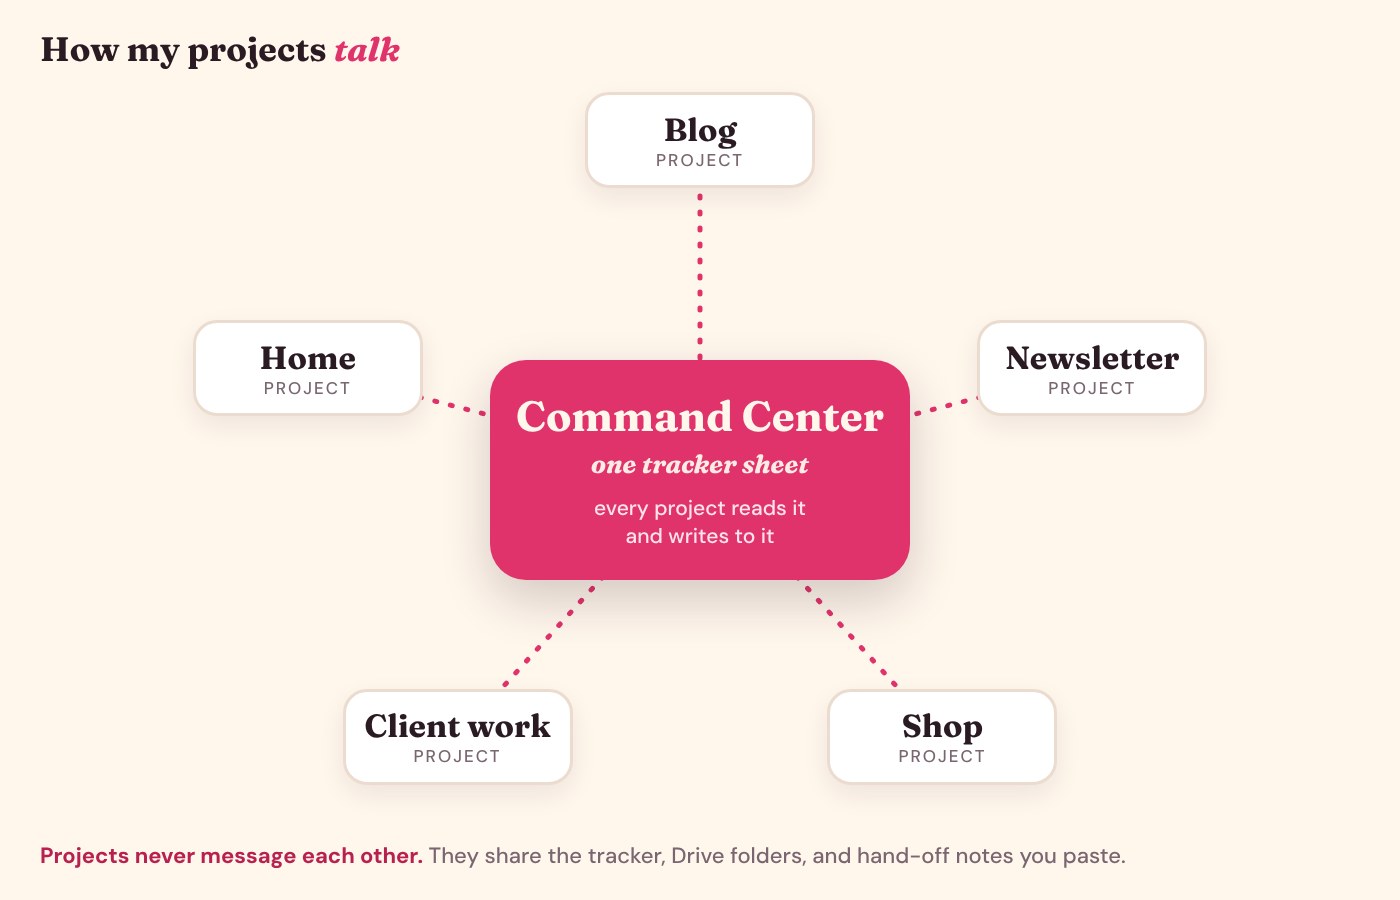
Here's the short version: I have one Claude project for each part of my life and business, plus one called Command Center that keeps track of all of them. The projects never talk to each other directly. They share three things instead: one tracker spreadsheet, a few shared folders, and short hand-off notes. That's it. It's simple, and it works.
The whole thing in one sentence
Each part of your life gets its own Claude project with its own instructions, and every project reads and updates the same tracker sheet, so your Command Center always knows what's going on everywhere.
First: what's a project?
A project in Claude is a workspace for one area of your life. Every chat you start inside it automatically knows:
- Instructions: what this project is for, your rules, where things live. You write them once.
- Context: files you add, like a style guide or notes.
- Memory: things Claude picked up from your past chats in that project.
- Scheduled tasks: jobs that run on their own at set times, like a weekly check.
The big benefit: you never explain yourself twice. Open the blog project and it already knows your blog, your voice and your rules.
The catch: each project only sees its own instructions, files and memory. Your blog project has no idea what you discussed in your newsletter project. That's a good thing (your private stuff stays put), but it means you have to give them a shared place to meet.
How my projects are set up
I have a project for each website I run, one for my husband Jake's running channel, one for the content work I do for others, one for my own Command Center, and a few more for side projects. Each one has instructions that start with what it's for and end with the same few shared rules.
All of them meet in the same three places:
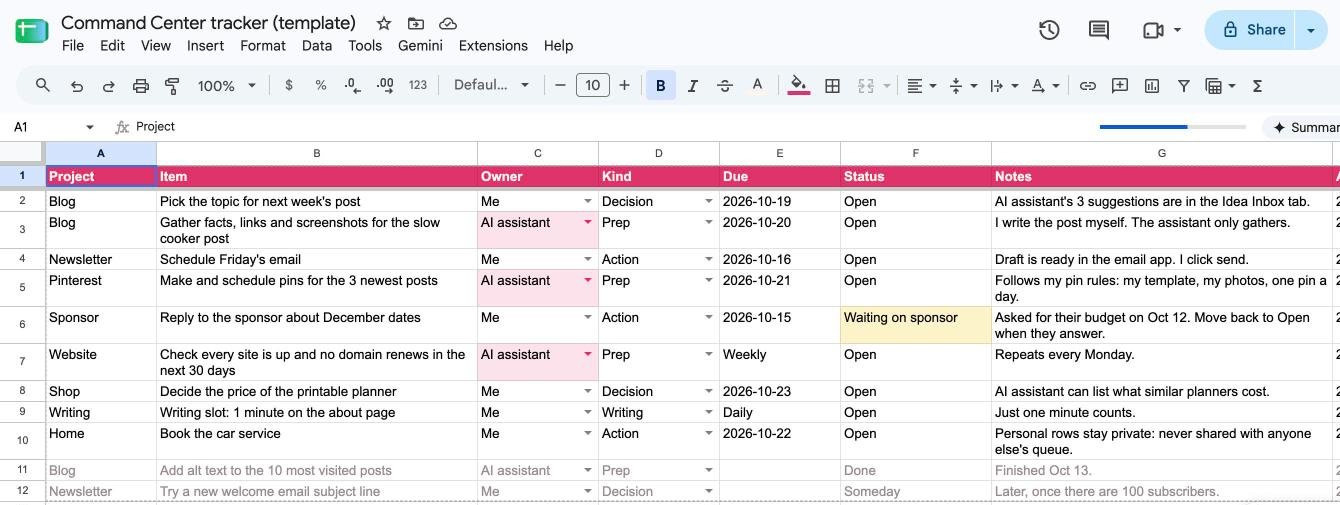
- The tracker. One Google Sheet with a row for every task, and a Project column that says which project it belongs to. Every project can read it and update its own rows. (Here's the full post on the tracker, with a free template.)
- Shared folders. One Google Drive folder per project, named like "Blog (shared docs)". Plans, drafts and reference docs go there, so any project (and any person) can find them.
- Hand-off notes. When work needs to happen in a different project, my morning queue writes a ready-to-paste note: "Do this in the Blog project. Paste this message:" followed by everything that project needs to know. I copy, paste, done.
Step 1: Set up your Command Center first
Your Command Center is the hub: the tracker sheet plus one Claude project that reads it every morning. I wrote a whole step-by-step for this: The One Spreadsheet That Runs My Whole Life. Do that one first, then come back.
Step 2: Make one project per area
Think about the big buckets of your life and work. For example: Blog, Newsletter, Shop, Client work, Home. Start with two or three. You can always add more.
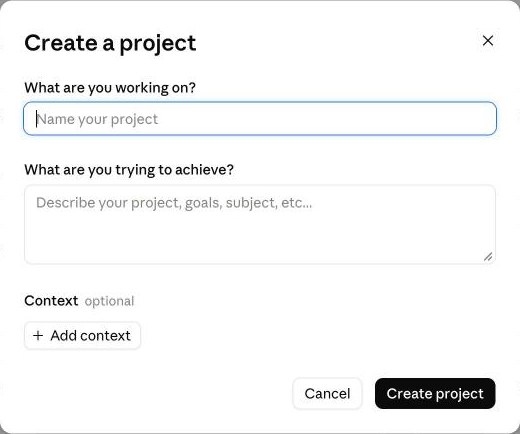
For each one: click Projects in Claude's left sidebar, then the black New project button at the top right. Under What are you working on? type the name. Under What are you trying to achieve? write one sentence about it. Click Create project.
Step 3: Write each project's instructions
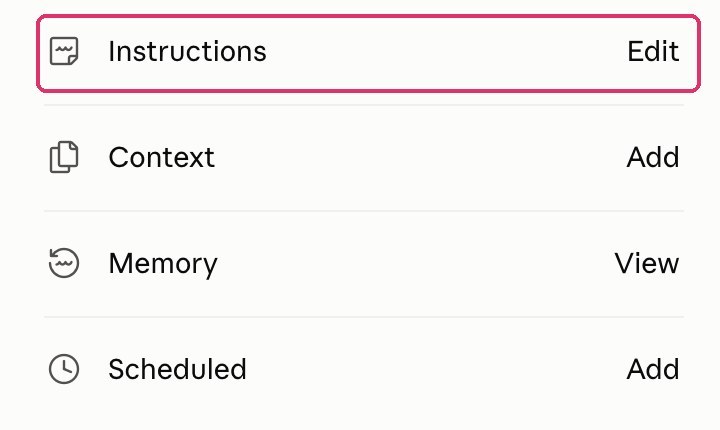
Open the project. On the right side, find Instructions and click Edit. A window called Set project instructions opens. Paste your instructions and click Save instructions.
Good project instructions have four parts:
- What it is. "You help me run my baking blog. I decide; you help."
- The rules. Your voice, what you never want, what always needs your yes.
- Where things live. Your website, your email tool, the shared folder.
- The Command Center block. The part that connects it to everything else. Copy this and fill in the brackets:
COMMAND CENTER. My tasks live in the tracker: Google Sheet [paste your sheet link], tab "Tracker". This project's rows have Project = [this project's name]. When work here finishes, set that row's Status to Done, add a short note and set Updated to today. When something new comes up (a task, a decision I need to make, a promise I made), add a row for it. Shared docs for this project go in Google Drive > [Project name] (shared docs). Never read or use rows from other projects unless I ask, and never use rows with Project "Home".
That last line is how I keep my personal stuff private: my work projects never look at my personal rows.
Step 4: Make a shared folder for each project
In Google Drive, click New, then New folder, and name it "[Project name] (shared docs)". Do this once per project. When a project makes a plan or a draft you'll want later, ask it to save it there.
Step 5: Let your Command Center write the shared rules
Some rules belong in every project. Mine include my "standing yeses" (the jobs my AI assistant may do without asking me) and my marketing and search rules.
Instead of writing them six times, I ask my Command Center project to write each rule set once, as a document saved in its Context. Each document starts with "Paste everything below the line into the instructions of..." and lists which projects get it. Then I paste it into each one.
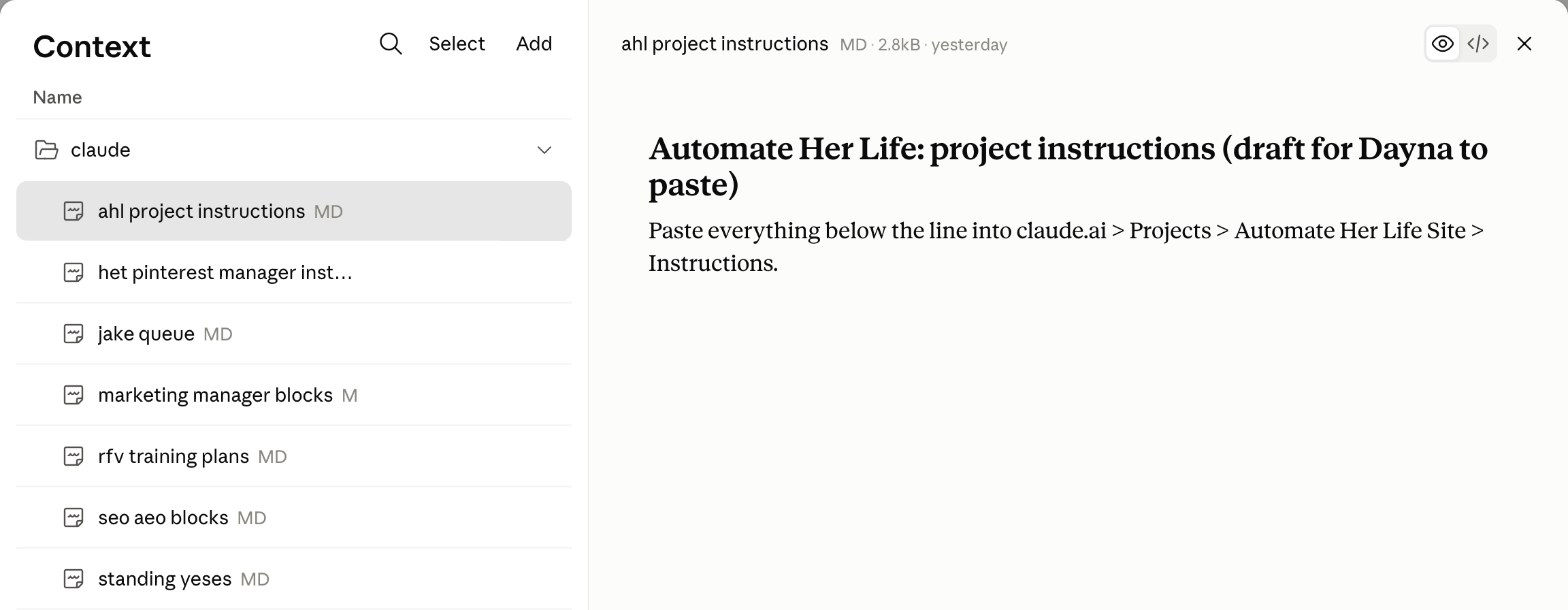
When a rule changes, it changes in Command Center first, then gets pasted everywhere. One more thing to check when you paste: delete any older rule in that project that now says the opposite, so your assistant doesn't get two different answers. (When I added my standing yeses, I had to fix two old rules like that.)
Step 6: Add hand-offs to your morning queue
If your Command Center makes you a morning queue (Step 1's post shows how), add this to its instructions:
When a task in my queue should be done in a different project, write it as: "Do this in the [name] project. Paste this message:" followed by a ready-to-paste message with what to do, any decision I already made, and the links it needs, so that project can start without asking me anything.
This is the closest thing to projects "talking" to each other: your Command Center writes the note, and you're the one who carries it over. It takes ten seconds, and nothing happens in a project without you knowing.
Step 7: Give projects their own scheduled tasks
A project can also run jobs on its own: a weekly check of your blog posts, a monthly Pinterest batch, a Friday numbers check. Click Scheduled in the left sidebar, then New task and Set up manually. In the window that opens, click Work in a project under the instructions box and pick the project, so the task uses that project's instructions.
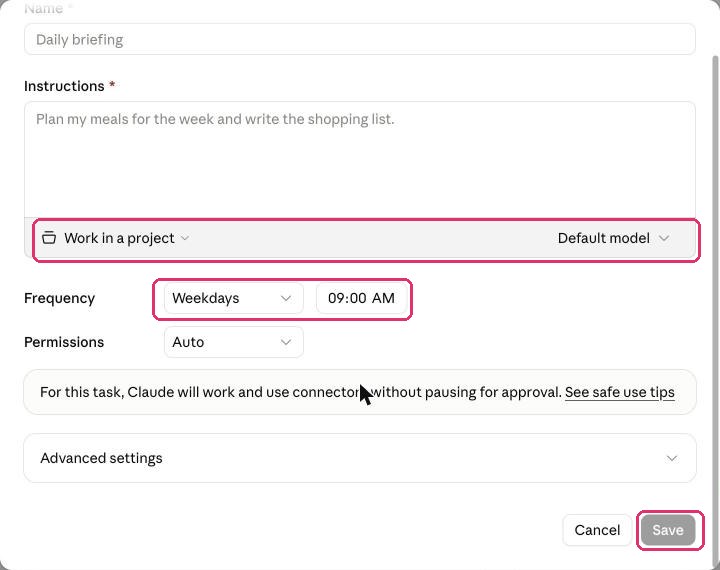
Have each scheduled task end by updating its rows in the tracker. That way, whatever it did shows up in your Command Center the next morning.
How it all fits together
Here's a normal day for me:
- At 8:45, my Command Center reads the tracker and sends me today's short list.
- One item says "Do this in the Automate Her Life project. Paste this message:" I paste it there, and that project gets to work.
- When it's done, it marks the row Done in the tracker.
- Tomorrow's queue sees that and moves on.
No project ever needs to know what the others are doing. They just need to know where the tracker is.
Tips
- One project per area, not per task. "Blog" is a project. "Write the holiday post" is a row in the tracker.
- Keep instructions short and specific. A page is plenty. Put long reference material in the shared folder or the project's Context instead.
- Name things the same everywhere. If the project is called "Blog", the tracker's Project column says "Blog" and the folder is "Blog (shared docs)".
- Your apps connect once. Connecting Google Sheets and Drive in Claude (under Customize, then Connectors) works for all your projects.
Setting this up is an afternoon, tops. Start with your Command Center and two projects, and add the rest as you go.
Want the tracker template to start with? Join the newsletter and it's yours, free, as soon as you confirm your email.